

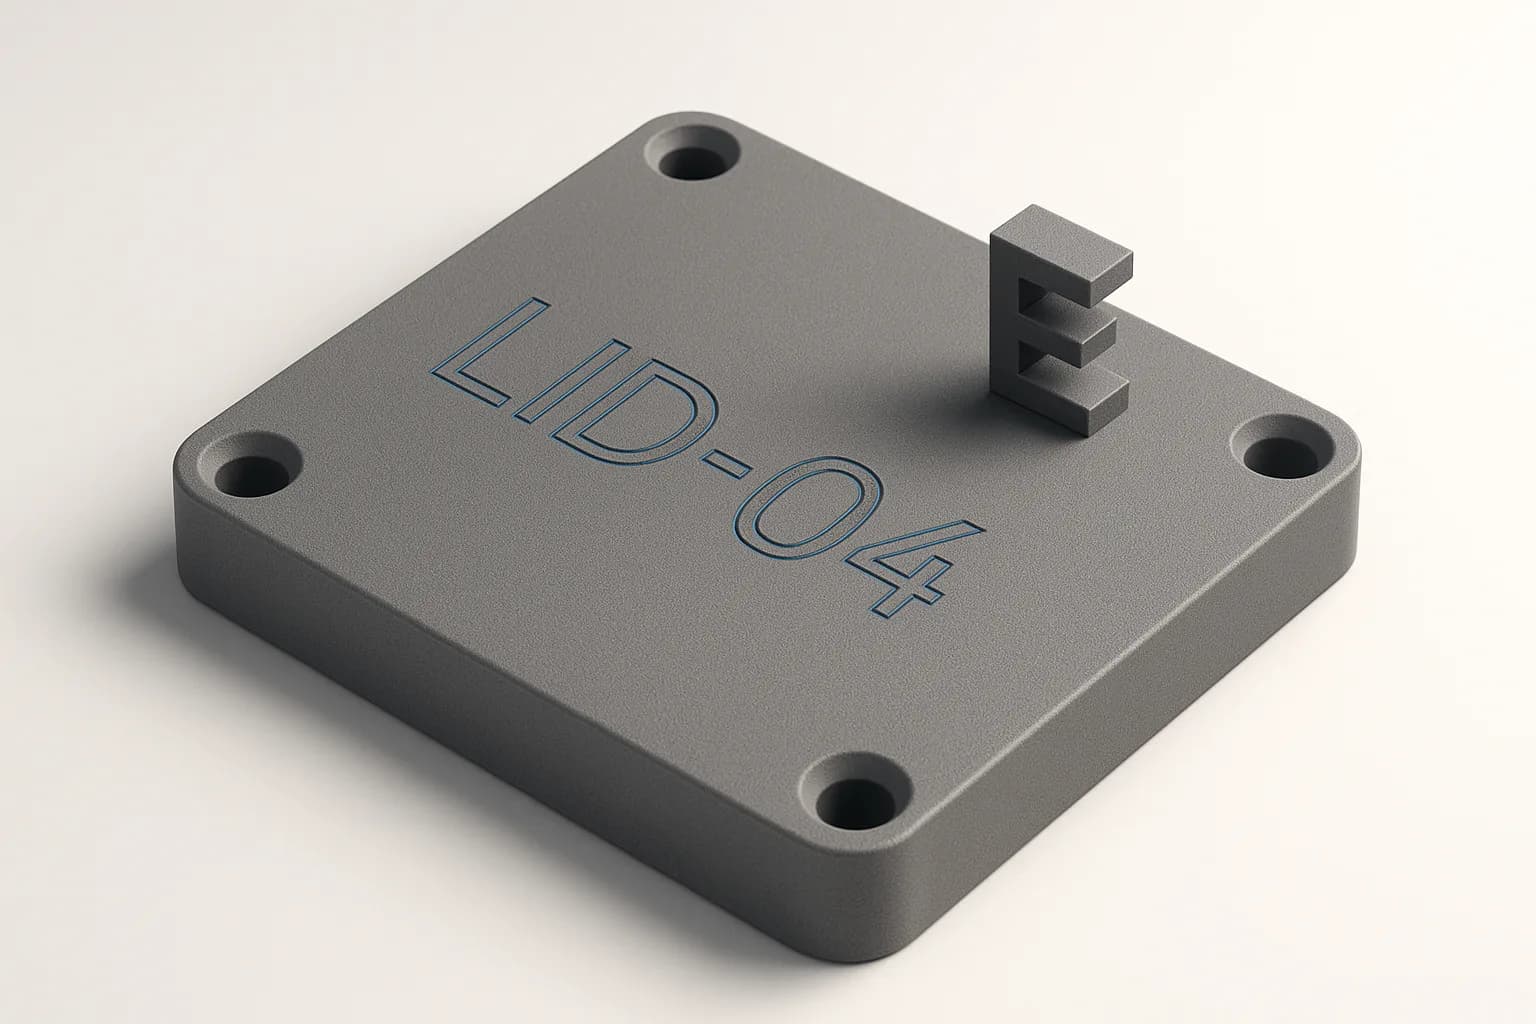
Zenve3D 0.11.4 ships Text. Type a word, tap where it goes on the sketch, and the letters are there — each one a region with its holes, ready to extrude like a rectangle you drew. Cut them into a lid and you have an engraved label; join them onto a bracket and you have a raised part number. Retype the word and the part rebuilds with the new letters.
A word is regions, not a picture
The choice that makes this worth more than an imported outline: every letter is its own region, and the counters are holes. An A, a B, an O extrude with their holes cut through, the way a washer's hole is part of the washer. An i is two regions, the stem and the dot. Extrude one letter alone, or all of them in one feature.
A text has almost no geometry of its own. It hangs off one anchor point, an ordinary sketch point: drag it and the word follows, dimension it to the origin and the word stays put. The anchor is where the baseline meets the alignment — the left end by default, the middle with centre, the right end with right.
Two dimensions come with it. Height is the cap height in millimetres — the top of an H, with round letters overshooting a hair as they do in print — and Angle turns the whole word about the anchor. Both are expressions, so lid_width / 8 is a fine height, and an angle of 90 stands the label up along an edge.
How to use it
Text is on the sketch palette — inside the Shapes tile on the iPad and Mac, its own tile on the web — and on key Q on both.
- Arm the tool. The panel shows the string, the font, bold, height, angle and alignment. Type the word first.
- Tap the canvas where the anchor goes. The word lands, and the tool stays armed for the next label.
- While it is armed, the panel edits the word you just placed — font, bold and alignment apply as you change them, the string, height and angle on Return.
- Leave sketch mode and extrude. Tap a letter to pick it; each is its own profile.
To edit a word later, tap any letter: the selection panel shows the text card, with height and angle in the Dimensions card. Box the whole word to hold it, delete it, or turn it to construction.
Example: an engraved lid
A label cut half a millimetre into the top of an enclosure lid.
- Sketch on the lid's top face.
- Text:
ZENVE, Inter, height6, centre alignment. Tap the middle of the face, then dimension the anchor to the lid's edges so it stays centred when the lid changes size. - Extrude, pick the five letters, distance
-0.5, Cut.
The lid prints with a legible recess. Change the string to ZENVE 3D and the recess is a word longer, still centred. The word never cuts the sketch around it: a rectangle drawn around a label is still the whole rectangle, and the letters are their own regions on top. Engrave is the cut you asked for, not a hole the sketch made for you.
Example: a part number on a bracket
The same word, raised instead of sunk.
- Sketch on the bracket's flat face. Text
BRK-04, JetBrains Mono, height4. - Extrude the letters, distance
0.6, Join.
Three layers of emboss at a 0.2 mm layer height reads under a thumb, and a family of brackets then differs by one string each. For a plate you spray through, use Black Ops One: a stencil face, so an O stays in one piece when the letters are cut all the way through.
Every letter is a region with its holes, so a
Bextrudes as aB— not as aBwith two plugs to remove.
Why the fonts are bundled
Five families ship inside the engine, as Latin subsets: Inter (the default), Nunito, JetBrains Mono, Crimson Pro (a serif) and Black Ops One (the stencil, one weight). You cannot pick a system font, and that is on purpose.
A Zenve3D project is a recipe, and the geometry is rebuilt from it every time it opens — on your Mac, on the iPad, on the web builder, or inside an AI agent's headless engine. A font named "Helvetica" would rebuild differently on each of those, or not at all where it is missing, and the engraving would land somewhere else. Bundled fonts mean the same letters, to the same curve, on every machine that opens the file, and a font never changes once it has shipped.
The curves are real: glyph outlines come in as cubic Bézier curves, the same kind the new Spline tool draws, not polygons pretending. A letter's side wall is one smooth face, and a shell or a slicer sees a curve.
Honest limits
- A text takes up to 256 characters, and the five families are Latin subsets: accented Latin is in, Greek, Cyrillic and everything else is not.
- The word is not merged into the ink around it. A shape drawn over a letter and the letter are two regions, and the sketch's trim, offset and mirror tools do not take a text.
- A letter's side walls are unnamed, so you cannot fillet the edge of a letter or sketch on its wall. The caps — the top of a raised letter, the floor of an engraved one — are ordinary faces.
- Black Ops One has one weight; bold on it is its regular.
- A construction text has no regions and so no ink: it is a note in the recipe, not a shape.
- The extrude picker takes one letter a tap. Hold the word in the sketch to edit it whole; pick its letters one by one to raise it.
Scripting it
If an agent is building the part for you, the .zcmd line is:
text $s "LID" at $p height "8" angle "0" font nunito bold align centre -> $t $h $a
extrude profile($s, 0) profile($s, 1) profile($s, 2) distance "-1" cut $plate
The first places the word on point $p and hands back the text, its height and its angle as dimensions; the second engraves it. set text $s $t "NEW" re-words it, and the letters that stayed keep their regions. The scripting post covers the rest.
What's next
Text landed in 0.11.4 beside the Spline tool it was built on — cubic Bézier curves that join lines and arcs tangent and stay tangent under a drag. Text along a curve, fit-to-width, and a font you bring yourself are the additive steps this design leaves room for; none is scheduled yet.